Brewers guide: How to set up an online store in one week April 2020
A UK brewer could no longer supply their usual pubs, so they started selling direct to the consumer online via a Shopify store. Here’s how they got set up in one week.
This article was first published by Unleashedsoftware.com, creators of Inventory Management solutions trusted by brewers around the world
Alright, we get it: if one more person tells you to pivot your business, you’ll lose it. So, yes, we’ll do our best to make this article a pivot-free zone. However there is one important, er, rapid change in direction that we think any primarily B2B product business should consider in this new Covid-19 environment – namely, setting up a direct-to-consumer (D2C) channel via an online shop front.
So today we’re going to show you how to set up an online store. Specifically, a Shopify store. There are many other similar and excellent platforms you can use, such as Magento, Amazon, and WooCommerce, but we’ll concentrate on Shopify here today simply because it remains one of the best and easiest platforms to use, because it integrates neatly with Unleashed inventory management and, not least, because they’re currently offering a 90-day free trial in response to coronavirus shutdowns.
It was also the platform used very recently by Unleashed customer Crate Brewery. The London-based beer makers set up this online store on Shopify in under a week as part of their rapid response to pub and retail store closures in the UK. So we caught up with them to see how it’s done.
7 Steps: How to set up a Shopify online eCommerce store in under a week
- Decide what you’ll sell
- Start an account and choose a plan
- Connect your website
- Choose a theme
- Add images and copy, and create products
- Connect finances and start shipping
- Start marketing to your new audience
Step 1: Decide what you’ll sell
Remember that you’re in a different shopping environment to what you’re used to – and targeting different buyers. So you might not want to list all your products, and some will make no sense online at all.
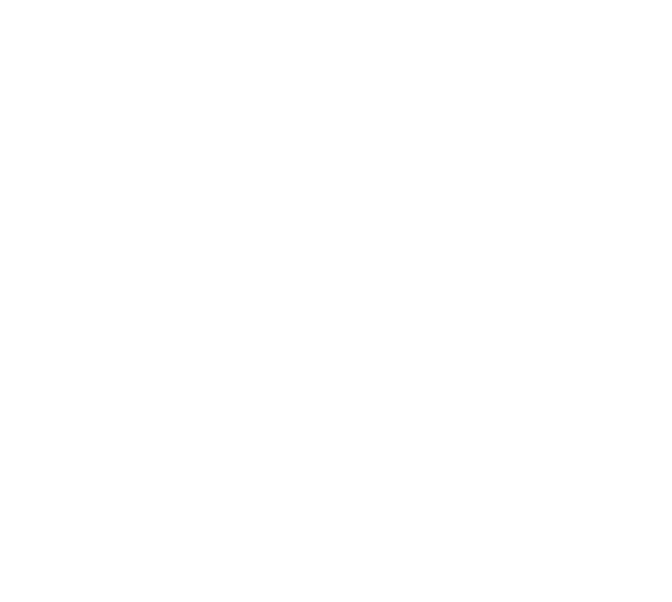
Crate Brewery, for example, normally sell beer and ciders in cans, two sizes of bottles, and by the cask and keg. For their online store however they’ve restricted themselves to cans only: Naturally there’s no demand for D2C kegs and casks, whereas bottles are heavier than cans, and cost more to ship.
Similarly, you should start with high demand, easy-to-fulfil products that will get some revenue flowing into your business, then finesse from there if needed. Remember, in line with the principle of ‘Fire, Ready, Aim!’ you can always add other lines later.
Crate Brewery’s online store concentrates on cans only as their best D2C play.
Step 2: Start an account and choose a plan
Starting an account is as simple as going to this page and clicking “Start free trial”. You’ll be asked to give your name, email address and to choose a name for your store, and voila, you have an online shop with a web address.
Make sure you choose a name that matches your business as this will be reflected in your URL. So if your business is Nana’s Pies and that’s what you name your store, the URL will be https://nanas-pies.myshopify.com
With this rudimentary set up you can be on your way – though you’ll not be able to do much without first selecting a billing option, which will take effect after your free trial ends.
Prices range from US$29 per month for a basic setup, through to US$299 per month, and the option you choose will depend on your size and needs. If you’re fulfilling orders from more than four warehouses, or need more than two other staff accessing the store, then you’ll need to plump for something other than the basic package.
Watch the webinar to see how Crate Brewery set up their D2C online store.
Step 3: Connect your website
Once you have created your online store (which is hosted on Shopify’s servers) you need to link it to your website. This can be very straight forward, or more complicated, depending on your needs.
Crate’s Data and Finance Analyst, Max Smith, opted for the easy and fast option. “We just created an extra link on our website header menu pointing to our default shopify webstore URL.
“Down the line we’d like to tidy that URL up, but it’s fine for now.”
Crate’s online store is a simple link on their main site’s top nav
The ‘tidying up’ that Max is referring to here involves creating a subdomain of your site – shop.cratebrewery.com for example – then linking it to Shopify so that when customers go to your store they see your brand’s URL. This is considered ‘tidy’ from a banding point of view and if you want to do this there are good technical instructions here.
An even trickier option is to link your store to a subdirectory (as opposed to a subdomain) of your site, which has to be done via a reverse proxy server. Why would you do this? While it’s more complicated and potentially error-prone it has the advantage that any existing presence in search that your current website has can flow through to your Shopify-linked subdomain, making it easier for your store to be found via Google.
However for the majority of those looking to rapidly pivot (sorry), this is probably a nice-to-have for a later time.
Step 4: Choose a theme
Now simply browse the gallery on Shopify and activate the theme that works best for you. Here, leaning on the default themes provided can be a huge time saver, if speed and agility is your main priority.
“It helped that we are a small company and we made a decision right at the start to move fast and be flexible,” says Max. “I think a larger company that wanted to take its time over ensuring custom fonts were used on the website, or wanted page layouts organised a certain way, would find it slower.”
Remember too that the brand experience can be carried here both by your product images on the page, as well as any photography and copy you choose to use.
For some examples across different industries take a look at these Unleashed customers with online stores:
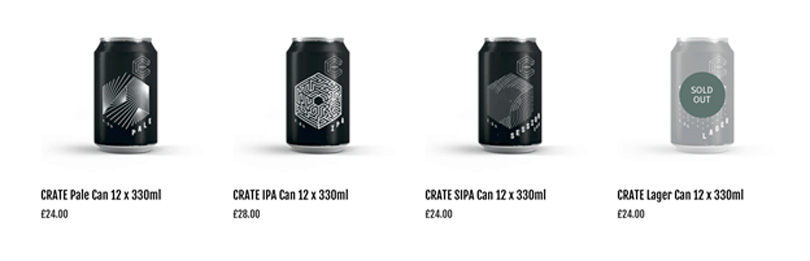
Awake Chocolate
Awake Chocolate’s store is an energetic match for their brand
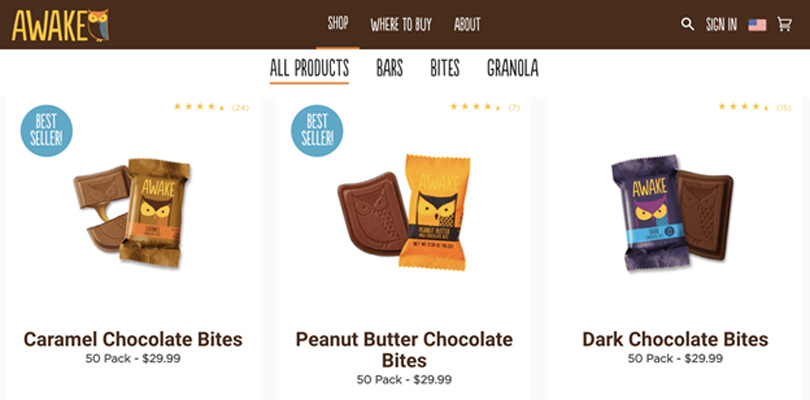
Behemoth Brewing
Behemoth Brewing’s store shows off its product art
Buck N’ Bass Inc
The Buck N’ Bass outdoor gear store has a rugged aesthetic
Step 5: Add images and copy, and create products
The first two are self explanatory – though we’ll add that if you’re new to the imagery game, then the free design tool Canva can be a Godsend here.
Adding products however can be a little trickier.
You’ll need to input all the details of your products, including Stock Keeping Unit, weight, dimensions and price. This can be bulk uploaded via a CSV file. However a better option for those already using Unleashed as an inventory management tool is using the Shopify Integration App.
This can be found within Unleashed under the Integration tab and allows you to pull all of your product details straight into your Shopify store. Once your store is running all purchases will flow back into your inventory management, reporting and billing functions within Unleashed.
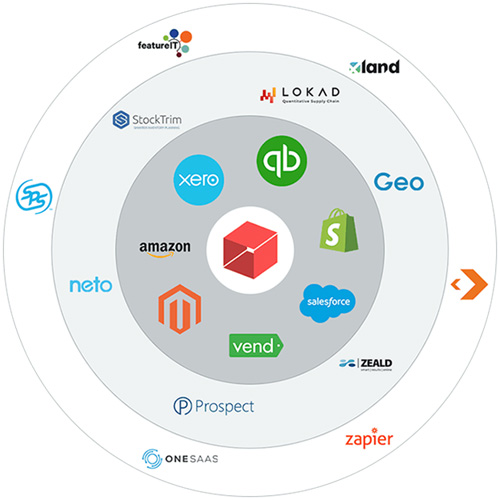
Unleashed’s native ecommerce integrations make creating online products easy
6: Connect finances and start shipping
A last step is to connect Shopify Payments to your bank account, and you’re in business with a D2C store. Of course you’ll also need to fulfil your orders once they start flowing through – and this can be as manual or as automated as you like.
At the simplest (though least efficient) end of the scale you can simply export your orders from your eCommerce platform and set about dispatching them as you would any B2B order – either yourself, or with a third-party service.
If opting for this approach, just be sure to follow safe delivery guidelines for your drivers – up-to-date information around Covid-19 is available at Safe Work Australia. And it’s also worth being aware that – while drivers aren’t currently required to hold RSA certification for alcohol deliveries – awareness is building about the risks of online supply. So make sure you’re acting within the spirit of the Responsible Service of Alcohol (RSA) guidelines and not delivering to the intoxicated or underage.
Using shipping and fulfilment apps
With the potentially higher volume of smaller orders you’re likely to get it makes sense to apply some SaaS agility to the fulfillment process. Shipping apps are available and will integrate with your platform (Shopify, Magento, etc) and link it to the courier firm you use – as well as talking to your billing and inventory management systems.
Step 7: Start marketing to your new audience
With your store up and running it’s now up to you to find the customers you need online.
D2C digital marketing is an entire discipline in itself, and best left for another time. But suffice to say you may want to consider some basic social media spend or Google Ads to reach your new customer base wherever they tend to gather, whether that’s on Instagram, LinkedIn, TikTok or Facebook.
If you decide D2C selling could be a longer term play for your business then content marketing is another option. It can be more cost-effective than online advertising, though tends to have a slower burn.
Finally, make sure you have a presence on any aggregator sites of businesses that are still open and able to deliver. Unleashed’s own platform, The Marketplace, for example is a free listing for any of its customers with an open online store – and in a very short time this could certainly be you.
This article was first published by Unleashedsoftware.com, creators of Inventory Management solutions trusted by brewers around the world